Creating the auto attendant
From the Microsoft Teams admin centre, select “Voice” > “Auto attendants” and click “Add”. We’re going to create a simple auto attendant and then come back to configured later. Name the auto attendant, in this example we’ve used the name “Reception” and configure the “Time Zone”, “Language” and “Enable voice inputs” option as you wish. “Enable voice inputs” switches on the ability for voice recognition for selecting options by the caller in the chosen language. Do not configure the optional “Operator” setting as this time, in fact if you try to set this option, the “Reception” account will not yet be available as a resource account.

On the subsequent screen, leave the default settings and click “Submit” to complete the creation.
Assigning the resource account to phone number
From the Microsoft Teams admin centre, navigate to “Org-wide settings”> “Resource accounts” and highlight the “Reception” account created earlier. Click “Assign/unassign” and configure as follows;Phone number type should be selected as “Online”, the number obtained earlier can be added as the “Assigned phone number” and the “Reception” auto attendant will be available via searching for the “Assigned to” option.

Configuring the auto attendant
Now we have everything in place, we’re going to configure the auto attendant created earlier based on the following flow;

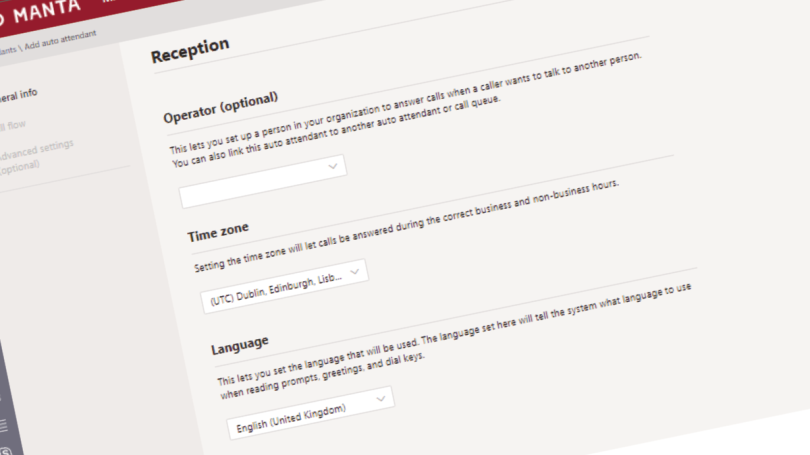
Updating the auto attendant
When the auto attendant is selected again from the Microsoft Teams admin centre, the first thing to notice is that the telephone number is now populated which means that the “Operator” can now be set as “Voice App” and the “Reception” account can be selected.

On the next screen, you can choose a greeting message by either typing the message and allow an automated voice will read it, or for a more professional approach record and upload your own.

Audio files must be less than 5MB and in either MP3, WAV or WMA format.
Creating the menu options
After the greeting has played, you can choose to disconnect the call, redirect the call or play menu options. Based on the flow above, for this tutorial, we’re going to create and play menu options to the caller. We’ve added 3 simple menu options based on the example flow and have created the message but again, a recorded message can be used.

We’ve assigned the menu options here to 3 users with applicable licences and have disabled the “Directory search”. When enabled, this would allow callers to dial an extension number or search using the letters on the phone’s keypad.

Next you can set business hours and what should happen to any incoming calls outside of these hours. Here we’ve set the hours to Monday – Friday and 09:00 to 17:00. Should you wish, a separate greeting can be play and if needed, another set of menu options can be configured.

Public holidays can be added in advance with customised messages and or redirections. If there’s no further configuration required, at this point you can click “Submit”.

At this point, you should now be able to dial the number assigned and test your new virtual reception.
In this tutorial we’ve setup a very basic auto attendant to mimic a virtual reception with just 3 options but the configuration doesn’t have to be that limited. Other possibilities are as follows;
- Route calls to additional auto attendants based on chosen options
- Route calls to multiple users in a department at once
- Send calls outside of hours to a shared voicemail
This tutorial has been split into the following posts;
Part 1 – Background and licencing
Part 2 – Resource accounts and auto attendant numbers
Part 3 – Creating and configurating the auto attendant (this post)
Disclaimer: Details are correct at time of publishing.

[…] Part 1 – Background and licencingPart 2 – Resource accounts and auto attendant numbers (this post)Part 3 – Creating and configurating the auto attendant […]
LikeLike
[…] Part 1 – Background and licencing (this post)Part 2 – Resource accounts and auto attendant numbersPart 3 – Creating and configurating the auto attendant […]
LikeLike